Why automation?
One of the companies I was working for previously, asked employees to check in daily at a Coda table. Coda is a platform that helps users create and manage websites through a visual editor, templates, and integrations with other tools. In my case, it was a fresh table every day where I had to insert the row and check if I was working from home or the office or if I was sick. As it was COVID time and everyone continuously was working from home, it sounded like a perfect case for automation. On top of that, another automation idea was to greet my teammates in a Slack channel with a random greeting every day. Automating the way to interact with your colleagues may sound weird, but just posting random greetings seemed fun to me.
Choosing an automation tool
While there are many automation SaaS platforms like make.com, zapier.com or centenarians like IFTTT, I’ve decided to use self-hosted n8n. n8n is easy to install and set up: you can use their NPM package, Docker container or Electron-based Desktop app for Mac and Windows.
Workflow overview
Here is what the final implemented n8n workflow looks like:

You can import workflow from the following gist or follow the step-by-step instructions below.
Installing n8n
If you have a home lab machine (like me), the Docker container probably would be the easiest way to go. We have to create a folder like ~/.n8n to persist n8n data between Docker container restarts and run the following command:
docker run -d --rm --name n8n -p 5678:5678 -v ~/.n8n:/home/node/.n8n n8nio/n8n:latestOnce a container is started, there is a fresh instance of n8n running that can be reached by opening http://localhost:5678 in the browser.
The first time we start and open the n8n UI, we will be asked to create a new user. After that, we will be redirected to the main page.
Google Sheets
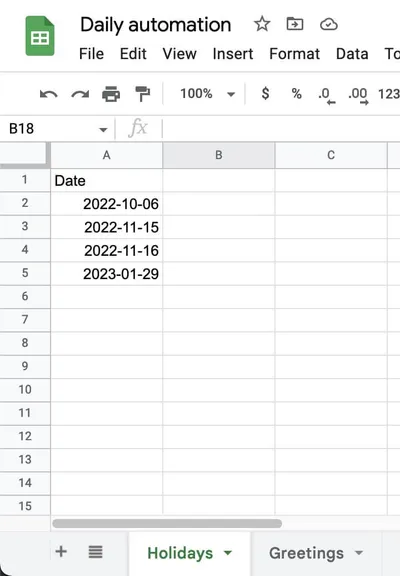
Google Sheets will be used to store the list of holidays and greetings. So as the very first step, we have to create a reference Google Sheet with two sheets:
- Sheet Holidays with the column Date and with the date when the workflow should not be triggered (like holidays). Column format should be set
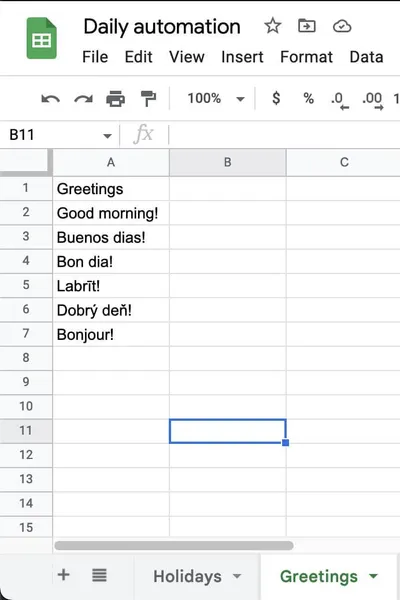
datebut the date format can be any. I’ve usedyyyy-mm-dd. - Sheet Greetings with the column Greetings for all the possible greetings
Credentials
Service Account to access Google Sheets from n8n
There are 2 types of credentials available to access Google Sheets API from n8n: OAuth2 and Service Account. We would use the Service Account, as it does not require our n8n instance to be publicly available from the internet for the OAuth2 redirect URL.
n8n Google integration has very detailed step-by-step instruction to create a service account.
Few comments on top of n8n docs:
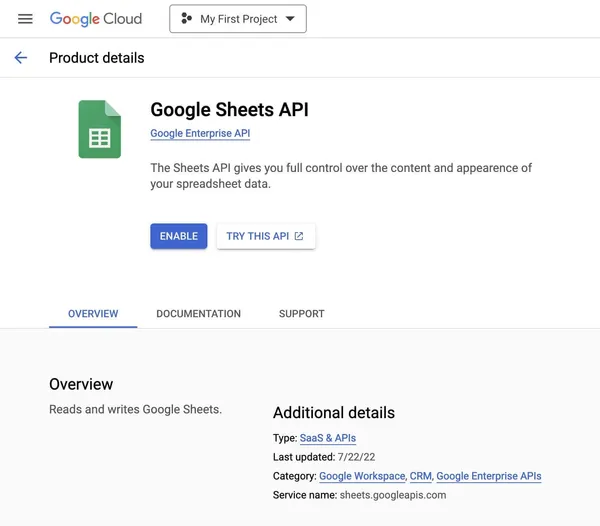
- We have to ensure that Google Sheets API is enabled in the GCP console by navigating to
APIs & Services, clicking on+ ENABLE APIS AND SERVICES, typingGoogle Sheets, opening the card and clicking onEnableif it is disabled
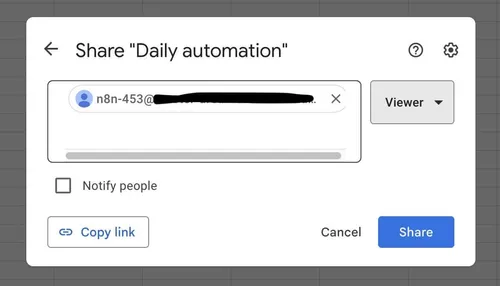
- We have to check the email of the created service account and share Google docs with this e-mail as a viewer, as the service account doesn’t have access to our documents by default
- In the n8n Credentials tab, in the Add new credential prompt, we use
Google APIas the service name and provide the service user email andprivate_keyfrom the key JSON file. In the details tab, only Google Sheets has to be selected to prevent service account misuse. If all was done correctly, we should see a greenConnection tested successfullymessage in n8n.
Coda credentials
We would need Access Token from Coda. Please follow n8n Coda integration to get one.
Building the workflow step by step
Creating the workflow
Click on creating a new workflow from the scratch and name it Daily routine.
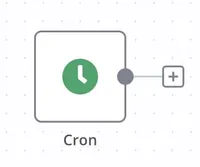
Step 1: Cron
This schedule has to be executed periodically (every morning), so we are starting with the Cron node and selecting Custom mode with the 0 9 * * 1-5 cron expression.
It will execute workflow from Monday till Friday at 09:00.
Check the timezone in Settings. It should be set to your local time zone.
Workflow with just a first node added looks like this:
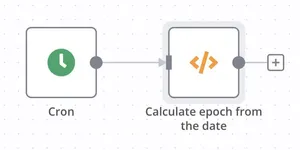
Step 2: Calculate epoch date
Google Sheets return date in the epoch format (days since 01/01/1900), so we need to write a little JavaScript code to convert today date to the epoch format.
Select the Code node and paste the following JavaScript code:
var epoch = new Date("01/01/1900");
  var now = new Date();
  items[0].json.epoch_date = Math.floor((now.getTime() - epoch.getTime()) / (1000 * 3600 * 24)) + 2;
  return items;
For the mode, we have to set Run Once For All Items to execute it only once per workflow run.
Now we can test the code by clicking on Execute node. It should give an output with today’s date in the epoch format, like 43893.
As the last action in this step, we have to connect the output of the Cron node to the Code node, so they are executed sequentially.
Here is what our workflow looks like after step 2:
Step 2 is done, time to move forward.
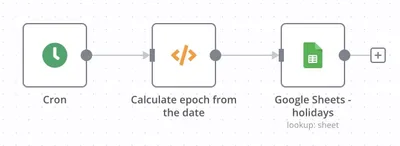
Step 3: Lookup for today’s date in Google Sheets
As we don’t want to run the workflow during the holidays, we have to check if the workflow should be skipped in case today’s date is found in the Google Sheets. To achieve that, we are creating a new node Google Sheets (NOT Google Sheets Trigger) and connecting the Code node to the newly created Google Sheets node. Inside of Google Sheets:
- For the Authentication select
Service Account - For the Credential for Google API select the Google Service Account created earlier
- Select
Sheetas the Resource - Select
Lookupas the Operation. We’ll be looking up the value across the range of cells. - For the
Spreadsheet ID, get the ID from the Google Sheet URL. E.g.kjerijdn394mhj34--kj34fd534FDfsf43from thehttps://docs.google.com/spreadsheets/d/kjerijdn394mhj34--kj34fd534FDfsf43/edit - Use
A:Aas the Range, as our data is in the columnAonly. - Data Start Row is
1 - Key Row is
0 - Lookup column should be set to
Dataor any other row header defined - In Lookup value select Expression and paste
{{$json["epoch_date"]}}. This means we are taking input from the previous node. - Click on
Add Optionsbutton, selectContinue If Emptyand ensure it is selected.
Now we have to click on the flywheel icon and select Always Output Data.
We can test this node by adding today’s date in the Google Sheets Date column and clicking on Execute node, where we should get Date output with today’s date in the epoch format.
Connect Code node from the step 3 to the Google Sheets node created in this step. Our workflow is growing. Yay!
Our setup after this step should look like that:
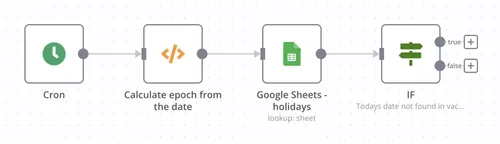
Step 4: Invert the logic
Until now if today’s date was found in the Google Sheet, the workflow would continue execution. What should we do if we need the opposite logic? No worries, it is easily solvable with the IF node.
Create a new IF node and connect Google Sheet to it.
In IF node, add a new condition for the string, and paste this tiny JavaScript code in the Value 1 input as an expression:
{{ $json["Date"] }}For the operation, select Is Not Empty.
Now, every time today’s date was not found in the Google Sheets, the false output will be triggered. That is exactly what we need.
We are almost there: built the logic of when to trigger the workflow and now we have to implement actual actions.
Here is the workflow:
Step 5: Check into the Coda table
n8n provide node for the Coda, so we have to add Coda node and attach it to the False output of the IF node. Inside the Coda node, choose Coda credentials and add the desired config.
As all Coda setups are different, below is an example of how I did it:
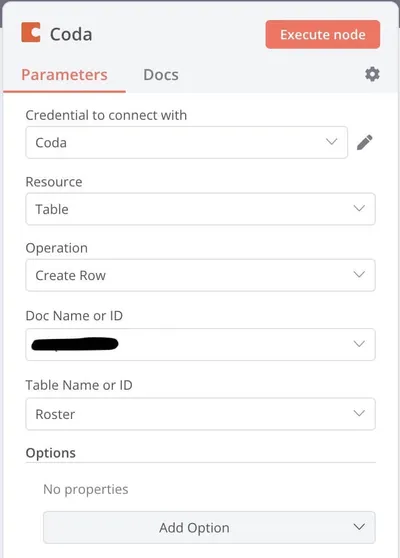
This is how it looked in Coda:

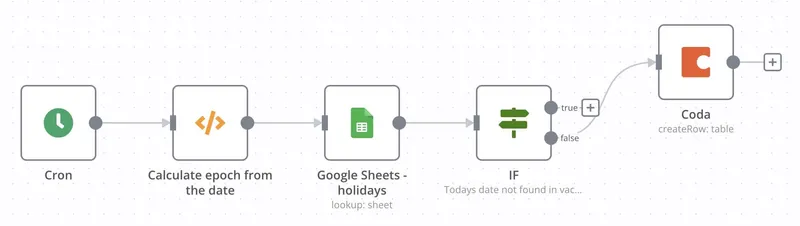
Here is the workflow after we added 1 of 2 actions:
Step 6: Get all greetings from the Google Sheet
The second activity we have to implement is to greet colleagues in Slack every day with a random greeting. We have to start by creating another Google Sheets node, but this time by reading all values in a range.
We are starting with the new Google Sheets node and attaching it to the False output of the IF node:
- Using the same values as in step 3 for Authentication, Credential for Google API and Resource
- Selecting Read as Operation
- Using the same Spreadsheet ID as in step 3
- For the Range using
Greetings!A:A, whereGreetingsis the name of our Sheet - Using the same values for the Data Start Row and Key Row as in step 3.
It all should look like that now:

If you populated your Google Sheets document with the greetings examples, the list of greetings will be shown when clicking on Execute node.
Step 7: Get a random greeting
When we have a list of greetings, how do we get a random one? By using the familiar Code node again. We are creating another Code node, and attaching it to the Google Sheet node:
-
For the mode, leave the default
Run Once for All Items -
Paste this code in the JavaScript field:
return [items[Math.floor(Math.random() * items.length)]];This JavaScript code returns a single item selected randomly from the n8n node input array, which is always called “items”. The code uses two built-in functions to accomplish this:- Math.random(): generates a random number between 0 and 1.
- Math.floor(): rounds down the number to the nearest integer.
First, Math.random() is used to generate a random decimal number between 0 and 1. Then, this decimal is multiplied by the length of the “items” array to ensure that the result is within the range of indices for the “items” array. Finally, Math.floor() is used to round down the result to the nearest integer, which serves as an index to select an item from the “items” array.
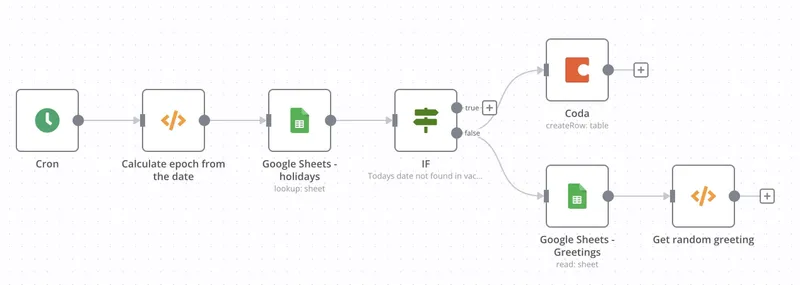
We are almost there, just the last step is missing:
Step 8: Send a randomly chosen greeting to Slack
The last step is what we are all here for: send randomly chosen greeting to Slack.
The proper way to interact with Slack would be to build the app. But we can cut the corner and use a Slack feature called workflow to send data on our behalf. The drawbacks are:
- We have to name workflow after our Slack name as workflow uses its name as a username when sending the message. E.g. if we name workflow as
John Doe, the message will be sent asJohn Doein Slack. - A small label called
workflowis applied to the message.
Workflow does not provide any authentication so be cautious with what and where you post. Anyone having your webhook URL (it is hard to guess, though) can send a message to your chosen channel through your workflow.
First, we have to create a workflow in the Slack app:
- Open Go -> Workflow Builder to open the workflow builder
- Push the Create button and give our workflow name as our username in Slack
- Update the workflow image with our Slack avatar
- Select Webhook as a way to start the workflow
- Set up a new variable named
greetingwith the typetextand save the Webhook step - Add a new step and select Send a new message
- Select a channel where to send the message. It can be a person or channel
- In the message text insert variable
greeetingand feel free to add any additional text if you like - Save the step and press Publish to publish the workflow
- We got a webhook URL in return and will need it in n8n just in a moment.
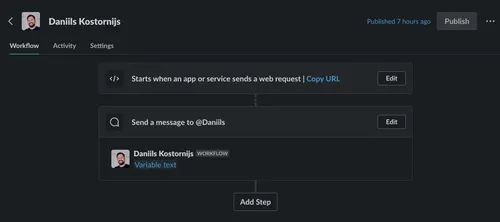
This is the workflow:
Now, back in n8n, we are creating the Webhook node and attaching it to the output of the Code block from step 7. the following parameters have to be applied to the Webhook:
- Authentication is
none POSTfor the Request method- For the URL paste the webhook URL returned from the Webhook builder in Slack
- In Body Parameters click to Add Parameter
- Use
greetingfor the Name and{{$json["Greetings"]}}for the Value. Remember to check Expression for the Value
Now, this is what our workflow looks like and we are ready to test it.

If everything was done correctly, you should see a message in the Slack channel like this:
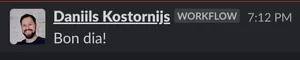
Well done! 👏
Hope it was worth the effort and will open new possibilities to automate your daily routine.